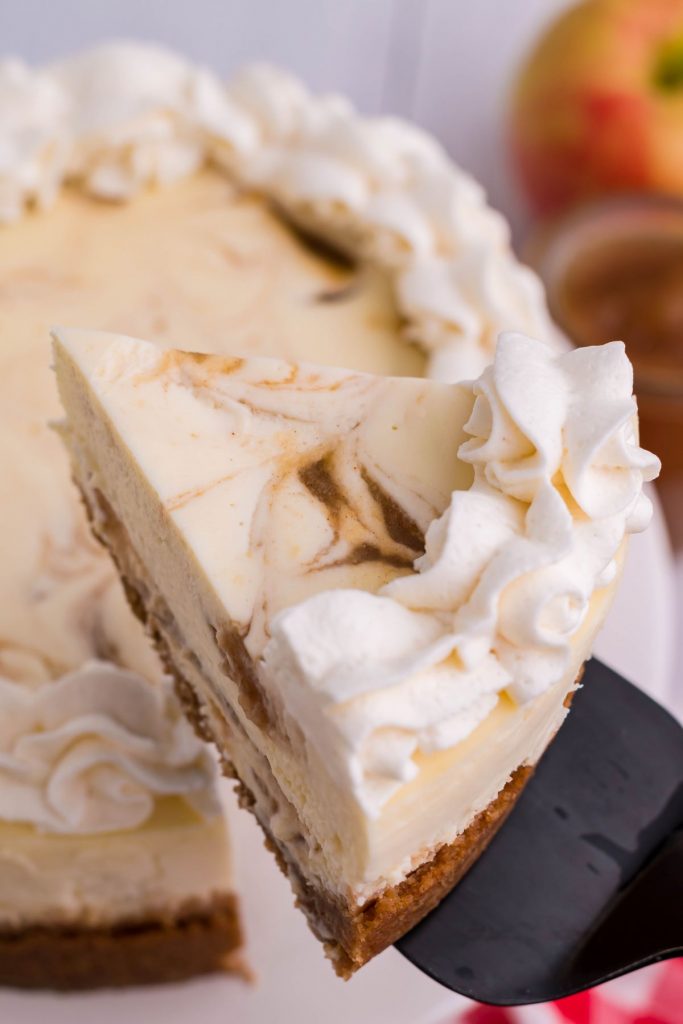
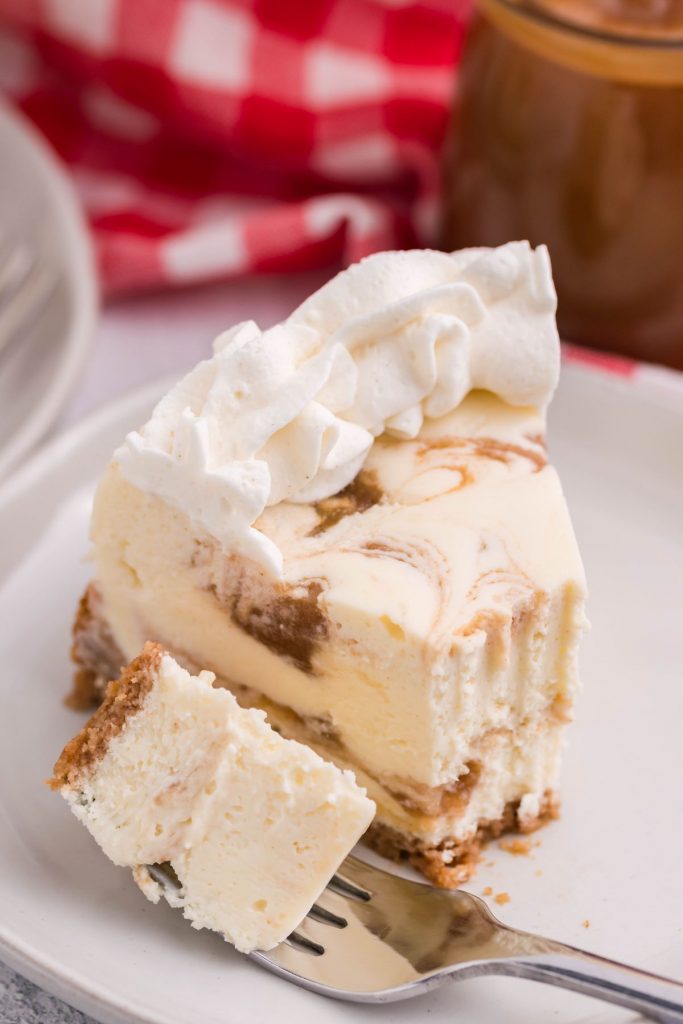
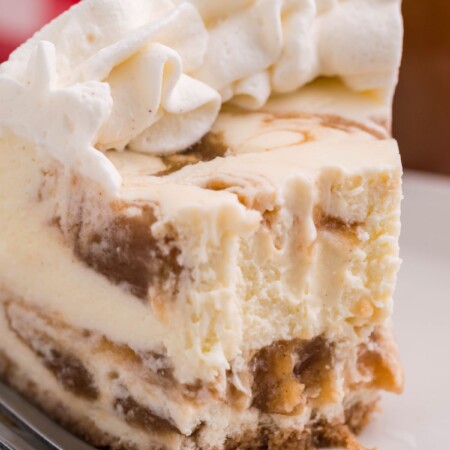
Creamy Cheesecake swirled with homemade apple butter and baked on a graham cracker crust. This Instant Pot Apple Butter Cheesecake is the ultimate fall dessert!

INSTANT POT APPLE BUTTER CHEESECAKE
In my last post I gave you a detailed tutorial on how to make your own Instant Pot Apple Butter. Over the next couple of days, I am going to give you several ways to incorporate that apple butter into your baking!
This Apple Butter Cheesecake was definitely a winner! If you love apple recipes as much as I do, you will need to try these Air Fryer Apple Fries they are also a great way to use up your fresh apples!
TIPS FOR A PERFECT INSTANT POT APPLE BUTTER CHEESECAKE
1. Make your own homemade apple butter! Of course this isn’t required, but I recommend it just to take this recipe to the next level. Homemade Instant Pot Apple Butter is so easy to make. You can find the recipe and tutorial HERE.
2. Bake your crust before you add in the filling. This will help get that crunch in your crust. If you prefer a softer crust, skip this part.
3. Make sure your cream cheese is at room temperature before beginning. This is an important step to make sure your cheesecake is a good consistency. Also, cream your cream cheese for 5-6 minutes before adding any ingredients to it. This keeps you from overmixing and having a lumpy cheesecake.
4. Make sure you let your cheesecake set in the refrigerator overnight. This helps the cheesecake set up completely and you will have a perfect cheesecake the next day.

FREQUENTLY ASKED QUESTIONS
Q: CAN I MAKE THIS CHEESECAKE IN A 6 INCH SPRINGFORM?
A: Yes, you can make this cheesecake in a 6 inch pan. Follow the directions as written, but add about 10 minutes on to the cook time.
If you need a springform pan, I HIGHLY recommend THIS ONE. It is the perfect size and works so well with the Instant Pot.
Q: WHAT SIZE INSTANT POT DO I NEED?
A: I use a 6 quart Instant Pot Duo– this one works perfect for me and my family of three
Q: MY CHEESECAKE LOOKS UNDERCOOKED! WHAT DID I DO WRONG?
A: This is perfectly normal. When you remove the cheesecake from the Instant Pot it will look a little undercooked. Let it set up overnight in the fridge and it will be perfect!
Do not cook any longer or you will over cook it, and it will be dry and crumbly when you cut into it the next day.

PRO TIP: To get the perfect slice, take a large butcher knife, and run it under hot water for 2-3 minutes to warm it up. You can also use a kitchen torch but be careful.
Remove any water from the knife and make your first cut into the cheesecake. Run the knife under water to clean, wipe off the excess water, and make your second cut. Ta-Da! Perfect slice every time.
EQUIPMENT USED
IF YOU LOVED THIS INSTANT POT APPLE BUTTER CHEESECAKE AS MUCH AS I DO, MAKE SURE YOU SHARE IT WITH YOUR FRIENDS ON FACEBOOK AND PINTEREST SO THEY CAN MAKE IT TOO!

Instant Pot Apple Butter Cheesecake
Ingredients
Crust
- 1 1/2 cups graham cracker crumbs
- 1/2 teaspoon cinnamon
- 5 Tablespoons butter melted
Filling
- 3 8 oz. packages cream cheese Room temperature- I recommend using a name brand such as Philadelphia
- 1/2 cup granulated sugar
- 2 Tablespoons flour
- 1 teaspoon cinnamon
- 1 teaspoon vanilla extract
- 1/2 cup heavy whipping cream
- 2 eggs
- 3/4 cup apple butter See post for my homemade instant pot apple butter recipe, or you can use store bought.
Topping:
- Whipped cream
- Cinnamon
Instructions
Crust
- Preheat your oven to 350 degrees/F.
- Add graham crackers to a food processor until you get about 1 1/2 cups of crumbs. Add in the cinnamon and melted butter and pulse until combined.
- Pour into the bottom of a greased 7″ springform pan and use your hand or the back of a spoon to press and form a crust bringing the crumbs up about 1 inch on the sides.
- Bake the crust for 10 minutes or until golden. Remove and cool on a wire rack.
Filling
- In the bowl of a stand mixer (or use a hand mixer) with a paddle attachment, cream the cream cheese for 3-4 minutes or until completely smooth and there are no lumps.
- Slowly pour in the sugar and flour and mix until just combined.
- Add vanilla and heavy cream. Mix on low speed until combined. Slowly increase the speed to high for about 1 minute,
- Scrape the sides and bottom of the bowl and make sure there are no lumps. Give one final mix before adding the eggs.
- Add the eggs one at a time and mix just until the yolk disappears into the batter.
- Pour half the batter into the prepared crust and gently tap the bottom of the pan on the counter to release any air bubbles. Dollop half of the apple butter on top of the cheesecake filling and use a toothpick to swirl. Spoon the remaining cheesecake filling on top and repeat the apple butter swirl on the very top of the cheesecake.
- Cover the pan completely with aluminum foil. Add one cup of water into the inner pot of your Instant Pot and add in the trivet,
- Place the cheesecake on top of the trivet and set your pot to high pressure for 40 minutes and allow to naturally release for 10 minutes.
- Once you can open the pot, remove the cheesecake and allow to cool to room temperature on a wire rack.
- Place the cheesecake in the refrigerator to set for at least 6 hours but overnight is recommended.
Topping:
- Pipe generous swirls of whipped cream around the top of the cheesecake using a large star piping tip and sprinkle with cinnamon if you wish.
- Keep any leftovers in an airtight container in the refrigerator for up to three days
Equipment
Did you make this recipe?
Make sure to follow on Pinterest for more recipes!

Leave A Reply!