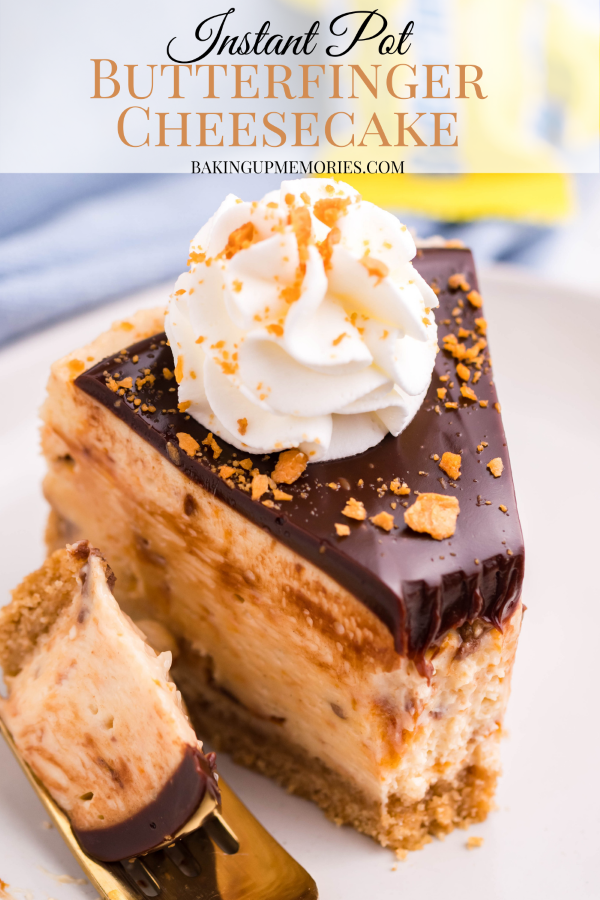
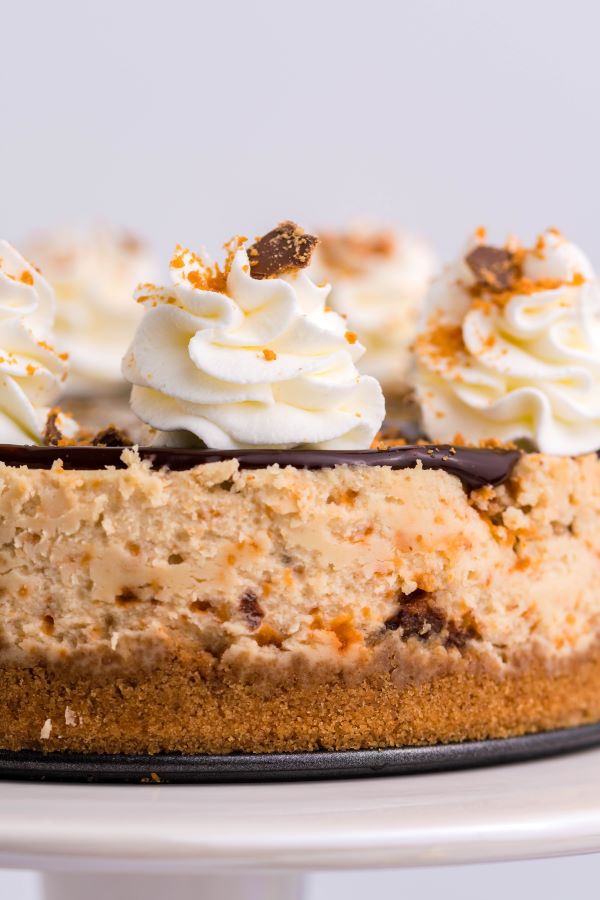
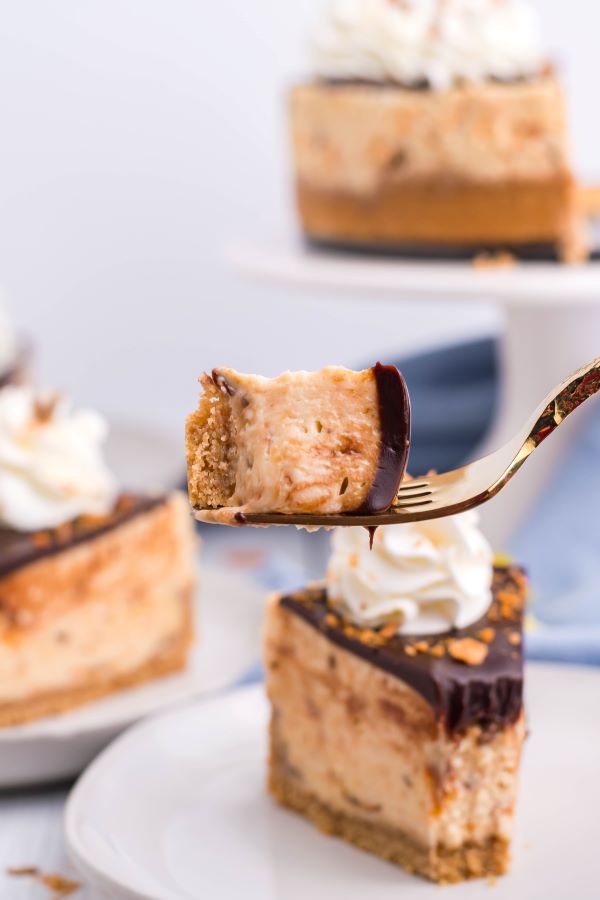
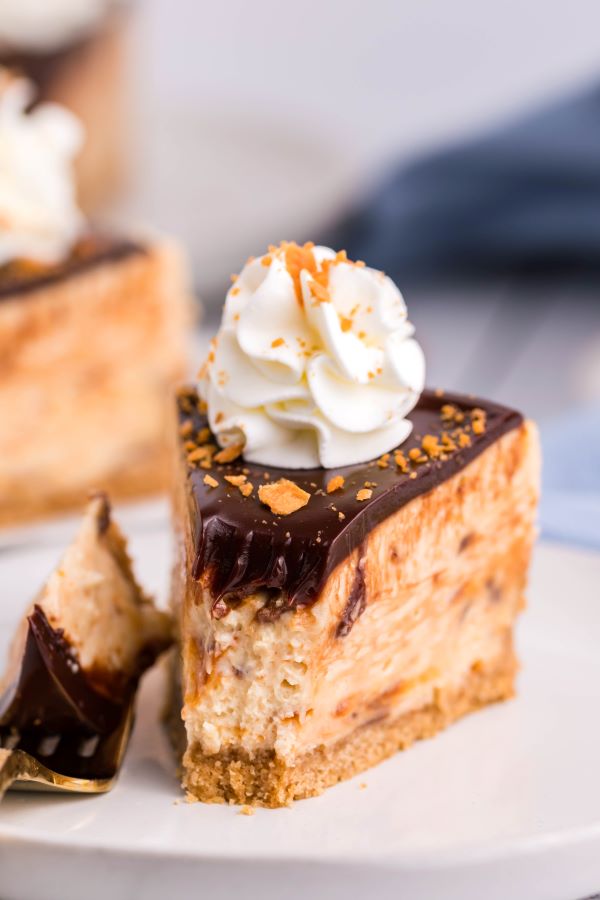
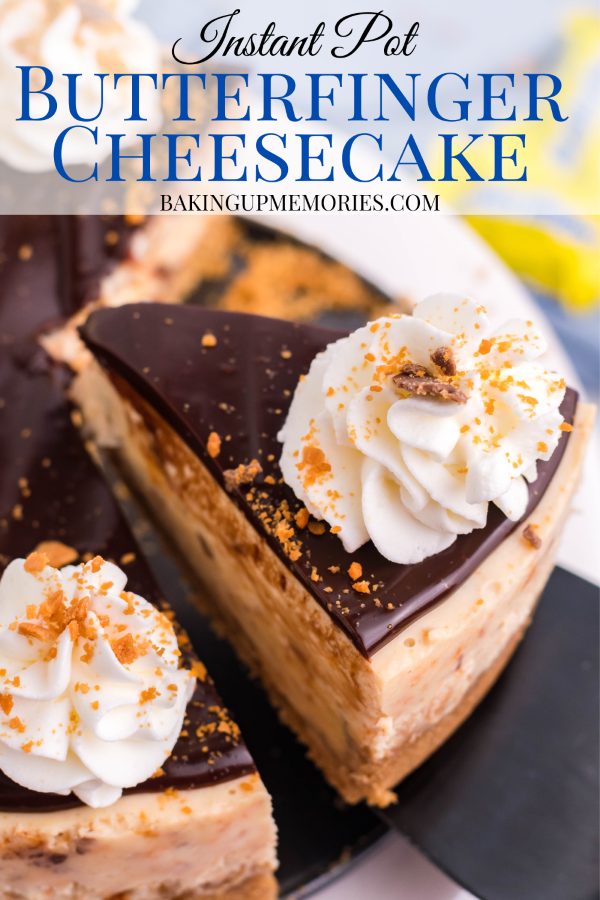
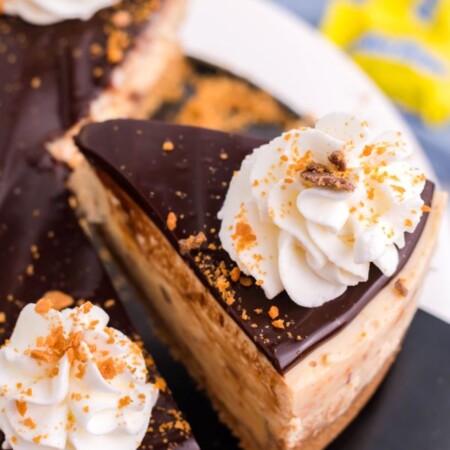
This Instant Pot Butterfinger Cheesecake is a decadent peanut butter cheesecake on a graham cracker crust packed with crushed Butterfinger candy, and topped off with a chocolate ganache. This cheesecake will soon become your new obsession!
BAKING TIPS FOR INSTANT POT CHEESECAKES
Cheesecakes are SUPER easy to make in the Instant Pot. Once you make your first one, you will never want to go back to the traditional method. However, there are a few things I have learned about using the Instant Pot method that will make your first time a little easier.
1. Do not over mix your batter. If you over mix (particularly the eggs) the texture and consistency will not be right after baking.
So, mix as little as possible while still making sure everything is combined well.
2. I recommend baking the crust before adding in the filling, HOWEVER it is not necessary. It just gives it that perfect crust texture.
3. WHEN THE CHEESECAKE IS FINISHED IN THE INSTANT POT, IT WILL LOOK UNDERCOOKED. DO NOT, I REPEAT, DO NOT ADD IT BACK IN OR ONCE IT IS SET IT WILL BE DRY AND OVERCOOKED! If you place the cheesecake in for 40 minutes and allow to naturally release for 10, it will be the perfect consistency once it is set.
SERVINGS TIPS AND VARIATIONS FOR INSTANT POT BUTTERFINGER CHEESECAKE
It is best to make this cheesecake the day BEFORE you want to serve it. Cheesecakes need to set overnight in the fridge before serving to make sure they are completely set.
I always make the ganache and whipped cream right before serving. Once the cheesecake is nice and cold it will harden the ganache faster.
You can change up this recipe simply by substituting in your favorite candy bar! You can add Snickers, Reese’s, or really whatever you want! This recipe is so versatile that you can personalize it to fit your family.
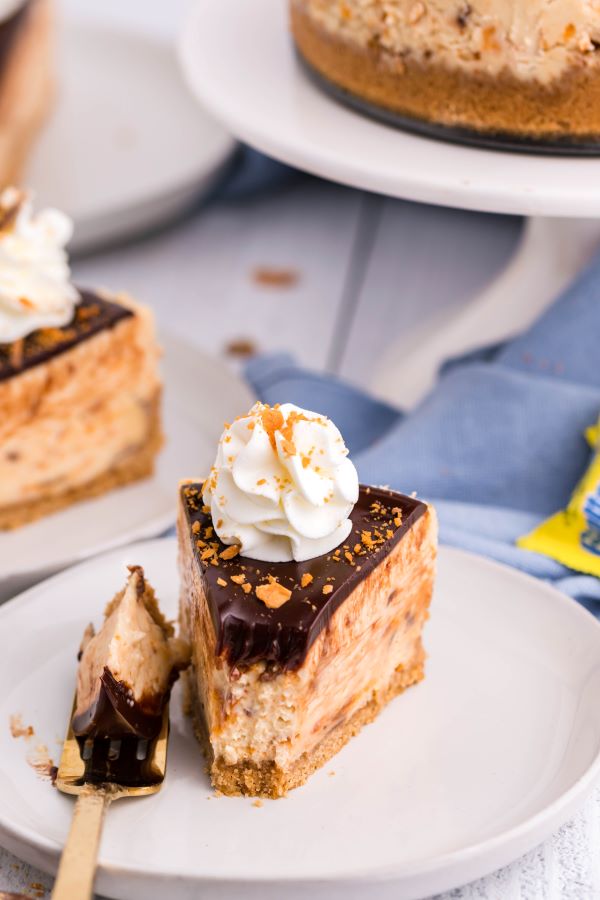
PRO TIP: To get the perfect slice, use a butcher knife and run under very hot water for 1-2 minutes per side to get the knife hot. Wipe off any access water and make your first slice. Run the knife under water again and repeat.
INGREDIENTS TO MAKE AN INSTANT POT BUTTERFINGER CHEESECAKE
For the crust:
Graham Crackers- about 1 1/2 packs
Butter
For the filling:
Cream Cheese– Softened to room temperature. If you do not soften your cream cheese you WILL have a lumpy cheesecake, and nobody likes that. Also, use a high quality cream cheese like Philadelphia, it is worth it.
Sugar
Flour– Used to thicken the cheesecake
Vanilla Extract– Pure if you have it, if not, imitation is fine as well.
Peanut Butter– Smooth
Heavy Cream
Eggs
Butterfinger Candy Bars
Whipped cream and mini Butterfinger candy for topping
HOW TO MAKE AN INSTANT POT BUTTERFINGER CHEESECAKE
Make sure your cream cheese is at room temperature, then preheat your oven to 350F. Prepare a 7″ springform pan by spraying generously with non-stick spray. You can also add a round of parchment on the bottom if you want added protection
Add the graham crackers into a food processor and pulse until you have a fine crumb. Add the melted butter and pulse until combined.
Pour the crumbs into the bottom of the prepared pan and use the back of a spoon to press and form the crust bringing the crumbs up the sides about 1 inch.
Bake the crust for about 10 minutes then remove and let cool.

In the bowl of a stand mixer, cream the cream cheese on high speed for 4-5 minutes until soft, fluffy, and there are no lumps.
Slowly add in the sugar and flour and mix for an additional minute.
Add in the peanut butter and mix until smooth and combined. Scrape the sides and bottom of the bowl.
Next, add in vanilla and heavy cream. Start mixing on low speed and slowly increase to high for about 1 minute. Scrape the sides and bottom of the bowl and mix for about 30 seconds to combine and remaining ingredients.
Last, add eggs, one at a time, and mix until just combined.
Fold in the crushed Butterfingers with a spatula.
Pour the batter over the crust and tap the pan on the counter to remove any air bubbles.
Cover the pan completely with aluminum foil and place on a trivet in the Instant Pot and add one cup of water.
Seal the Instant Pot and bake on high pressure for 40 minutes and allow a natural release for 10 minutes.
Remove from the Instant Pot and allow to cool to room temperature. Place in the refrigerator and allow to set over night.
TOPPINGS
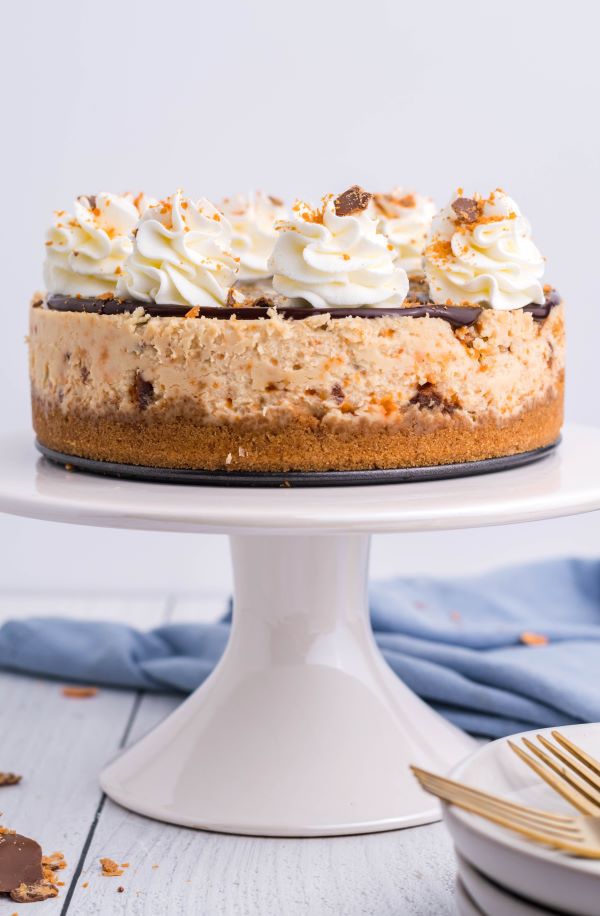
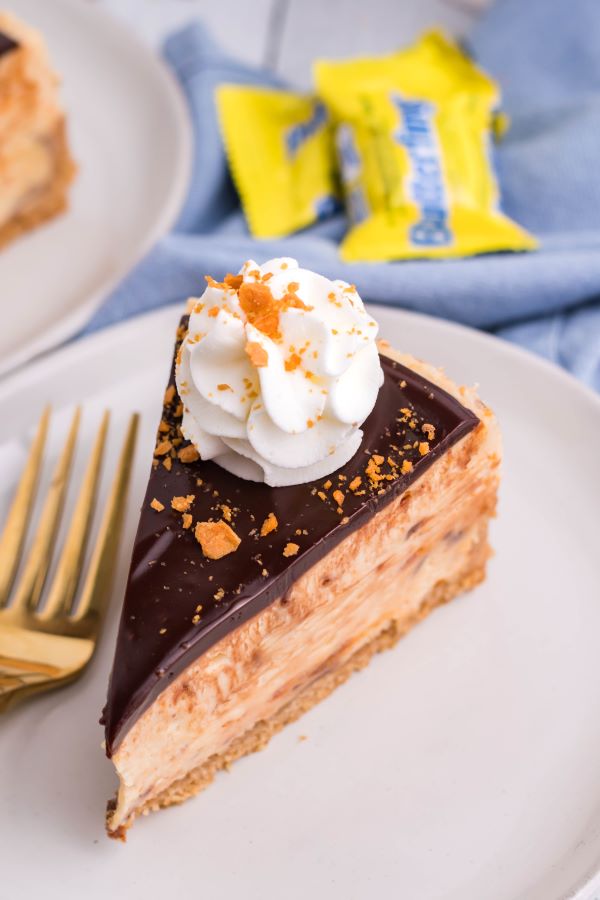
I love pairing this cheesecake with a semi-sweet chocolate ganache, whipped cream, and crushed Butterfinger candy. Add whatever toppings you have on hand or just leave plain.
To make the ganache, simply place the chocolate and heavy cream in a microwave safe bowl and microwave on 30 second increments until melted and smooth. Allow to cool for about 5 minutes then pour over your set cheesecake.
Pipe with whipped cream and your favorite toppings and serve!
FAQ’S
1. CAN I USE A 6-INCH SPRINGFORM PAN?
A: Yes! You can absolutely use a 6 inch, just know that the cheesecake will be a little thicker. Add on about 5 minutes cook time.
2. MY CHEESECAKE LOOKS VERY UNDERCOOKED WHEN I REMOVE IT FROM THE INSTANT POT? IS IT DONE???
A: Yes! The cheesecake WILL look undercooked when you remove it from the Instant Pot, but trust me, just let it cool and place it in the refrigerator and it will be fine!
3. HOW LONG DOES MY CHEESECAKE HAVE TO SET BEFORE I CAN SERVE IT?
A: I recommend letting your cheesecake set overnight to fully set. However, if you are in a pinch, I would at LEAST let your cheesecake chill in the fridge for 6 hours.
Want More Instant Pot Cheesecake Recipes?
Instant Pot Cinnamon Roll Cheesecake
Instant Pot Chocolate Cheesecake
Instant Pot Strawberry Cheesecake
If you love this Instant Pot Butterfinger Cheesecake as much as I do, make sure you share it with your friends on Facebook and Pinterest so they can make it too!
Instant Pot Butterfinger Cheesecake
Ingredients
Crust
- 1 1/2 cups Graham cracker crumbs
- 4 Tablespoons Butter melted
Filling
- 2 8 oz. packages cream cheese room temperature
- 1/4 cup smooth peanut butter
- 1/2 cup granulated sugar
- 2 Tablespoons flour
- 1 teaspoon vanilla extract
- 1/2 cup heavy whipping cream room temperature
- 2 eggs
- 1/2 cup crushed Butterfinger candy
Topping
- 1/2 cup semi sweet chocolate chips
- 1/4 cup heavy whipping cream
- whipped cream
- crushed Butterfinger candy
Instructions
Crust
- Preheat your oven to 350 degrees F. and prepare a 7″ springform pan by spraying generously with non-stick spray and set aside.
- Add graham crackers to a food processor until you get about 1 1/2 cups of crumbs. Add in the melted butter and pulse until combined.
- Pour into the bottom of a greased 7″ springform pan and use your hand or the back of a spoon to press and form a crust bringing the crumbs up about 1 inch on the sides.
- Bake for 10 minutes then remove to a wire rack to cool.
Filling
- In the bowl of a stand mixer (or use a hand mixer) with a paddle attachment, cream the cream cheese and peanut butter for 5-6 minutes or until completely smooth and there are no lumps.
- Slowly pour in the sugar and flour and mix until just combined.
- Add vanilla and mix until smooth and combined.
- Slowly pour in heavy cream and mix on low speed until combined. Slowly increase the speed to high for about 1 minute,
- Scrape the sides and bottom of the bowl and make sure there are no lumps. Give one final mix before adding the eggs.
- Add the eggs one at a time and mix just until the yolk disappears into the batter.
- Fold in crushed Butterfinger candy with a spatula.
- Pour the filling into the prepared crust and gently tap the bottom of the pan on the counter to release any air bubbles.
- Cover the pan completely with aluminum foil. Add one cup of water into the inner pot of your Instant Pot and add in the trivet,
- Place the cheesecake on top of the trivet and set your pot to high pressure for 40 minutes and allow to naturally release for 10 minutes.
- Once you can open the pot, remove the cheesecake and allow to cool to room temperature on a wire rack.
- Place the cheesecake in the refrigerator to set for at least 6 hours but overnight is recommended.
Topping
- Add the chocolate and heavy cream to a microwave safe bowl and microwave on 20 second increments, stirring in between, until the chocolate is melted and smooth.
- Let the ganache cool for about 5 minutes then pour over the cold cheesecake. Top with whipped cream and crushed Butterfingers and serve!
- Store in an air tight container in the refrigerator for up to three days.
Did you make this recipe?
Make sure to follow on Pinterest for more recipes!

Comments & Reviews
I know that this is for instant pot but love the flavors. How would you go about it with measurments and bake time to make it in the oven say for a 9 or 10 inch cake. would you just double the amounts?
Hello!
Yes, you can easily double the ingredients for a 9inch cheesecake.
Follow the directions as written, and bake at 350 degrees F for 15 minutes, then reduce the heat to 200 degrees F for 50 min-1 hour. Once the cheesecake has a slight jiggle to it, turn the heat off and crack the oven door to allow the cheesecake to cool slowly for about 20-30 minutes.
Transfer to the refrigerator overnight to allow to set completely 😊
Let me know how it turns out for you!
what size instant pot can you make it in? I have a 5 qt
I use a 6 qt. With a 7 inch pan. You can use your Instant Pot and maybe a 6 inch pan? Just make sure the pan fits wit a little bit of room around the sides 🙂
Why isn’t this “sharable”?
The site went down for a little while yesterday and there are some things I haven’t had the chance to add back yet… I will be continuing to work on it today.
You should still be able to share via Facebook if that is where you found it 🙂
Thanks for the comment!
When you say cover completely does that mean the top and the bottom?
Yes top and bottom. Try to seal as best as you can :).
Do I have to have a stand up mixer or can I use a hand held?
Hand held works just fine 🙂